
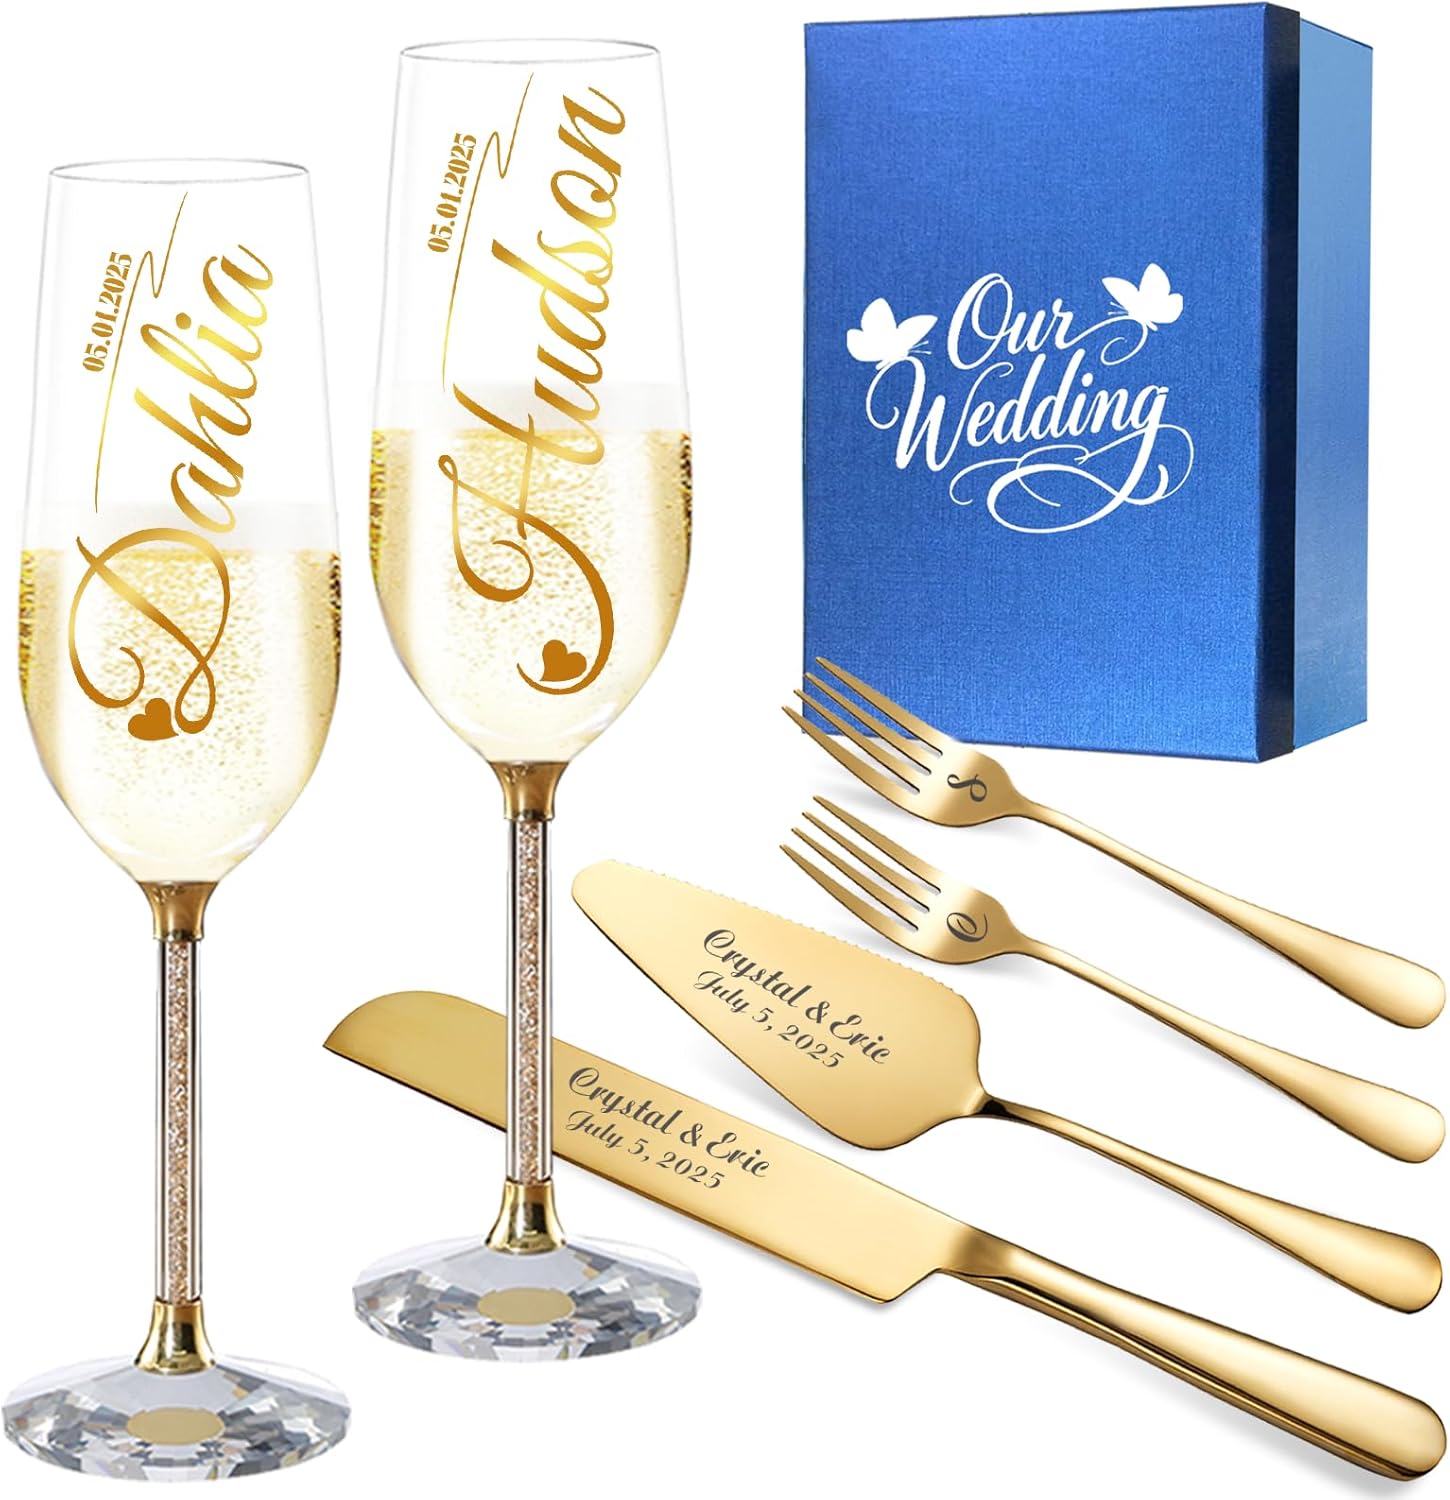
HJX Personalized Wedding Cake Knife and Server Set with Champagne Flutes, Custom Name Text Toasting Glasses for Bride and Groom, Cake Cutting Set Ideal Wedding Engagement Bridal Shower Gift
Product details
| Management number | 224848842 | Release Date | 2026/05/09 | List Price | $18.40 | Model Number | 224848842 | ||
|---|---|---|---|---|---|---|---|---|---|
| Category | |||||||||
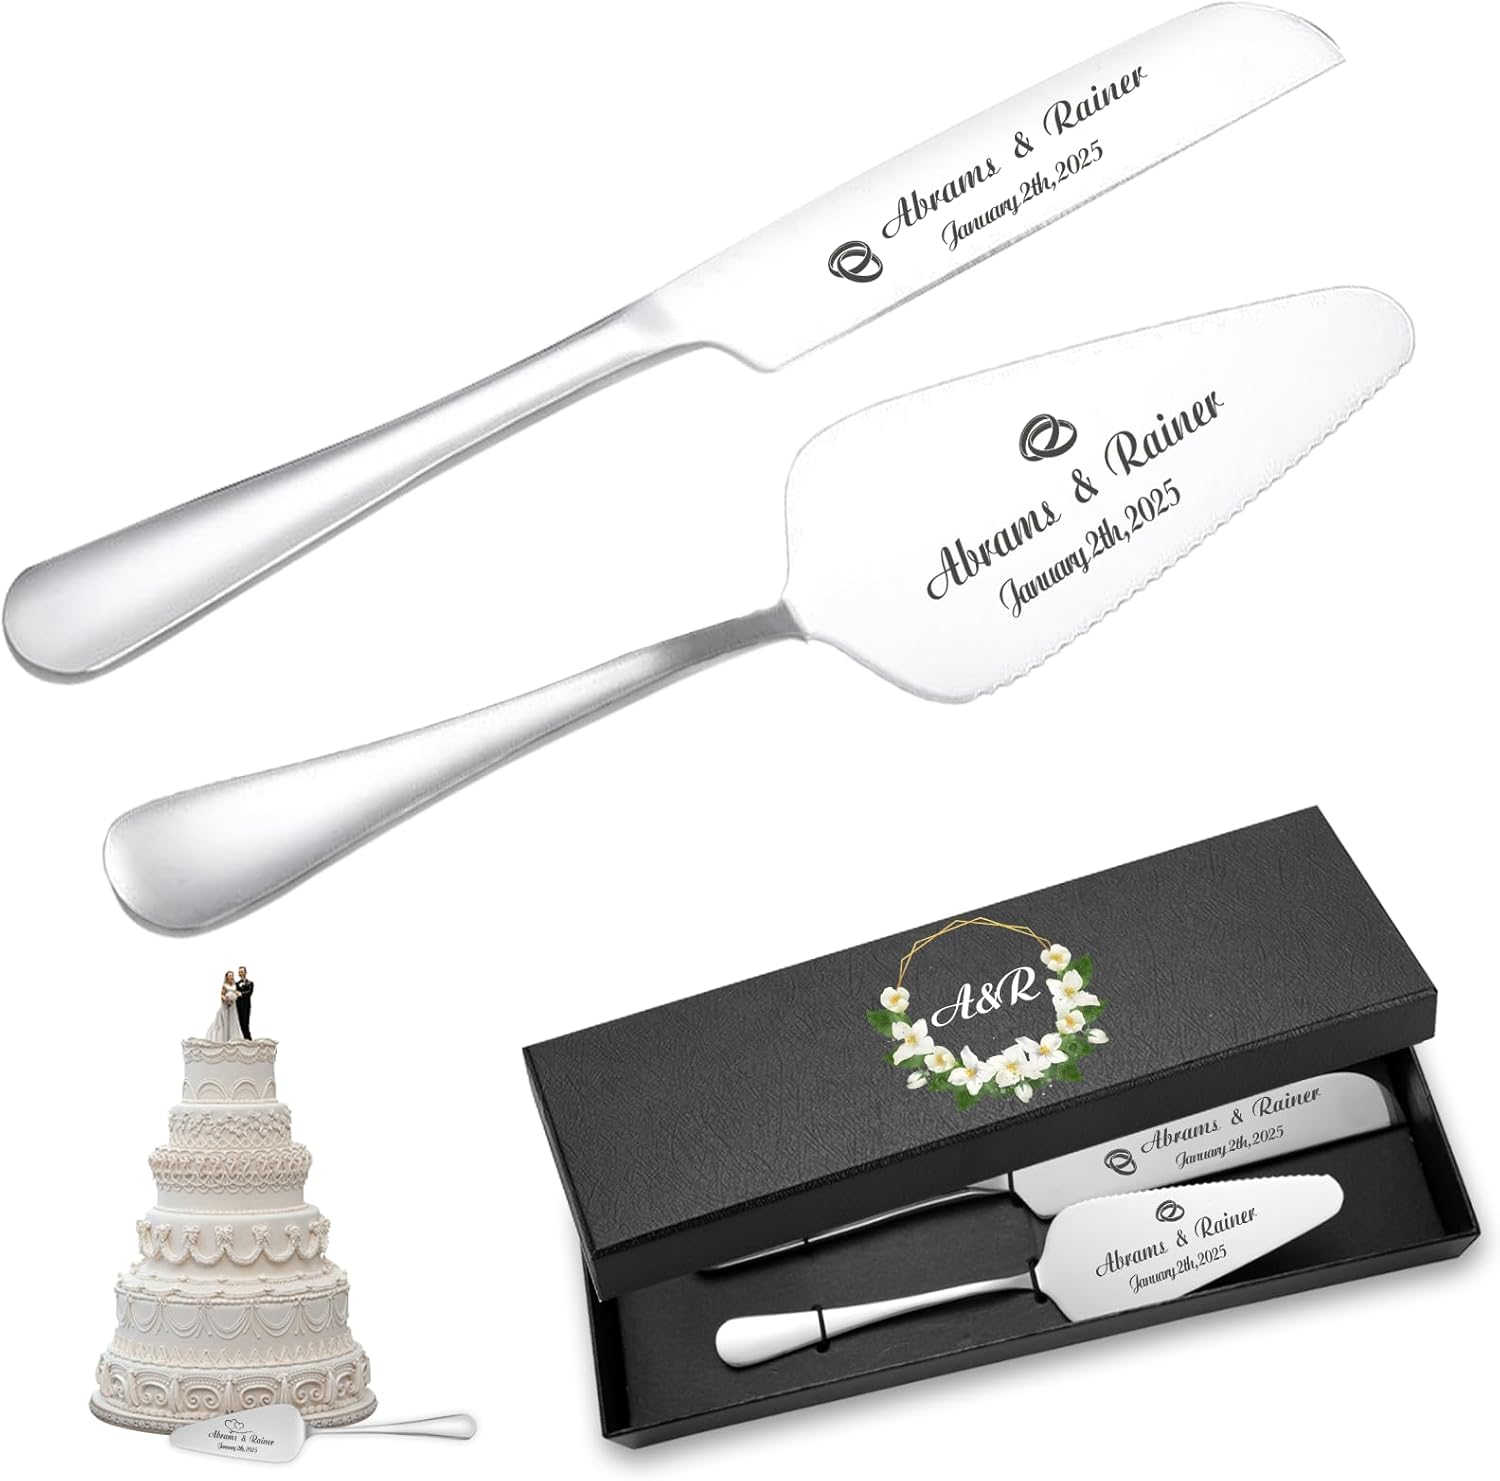
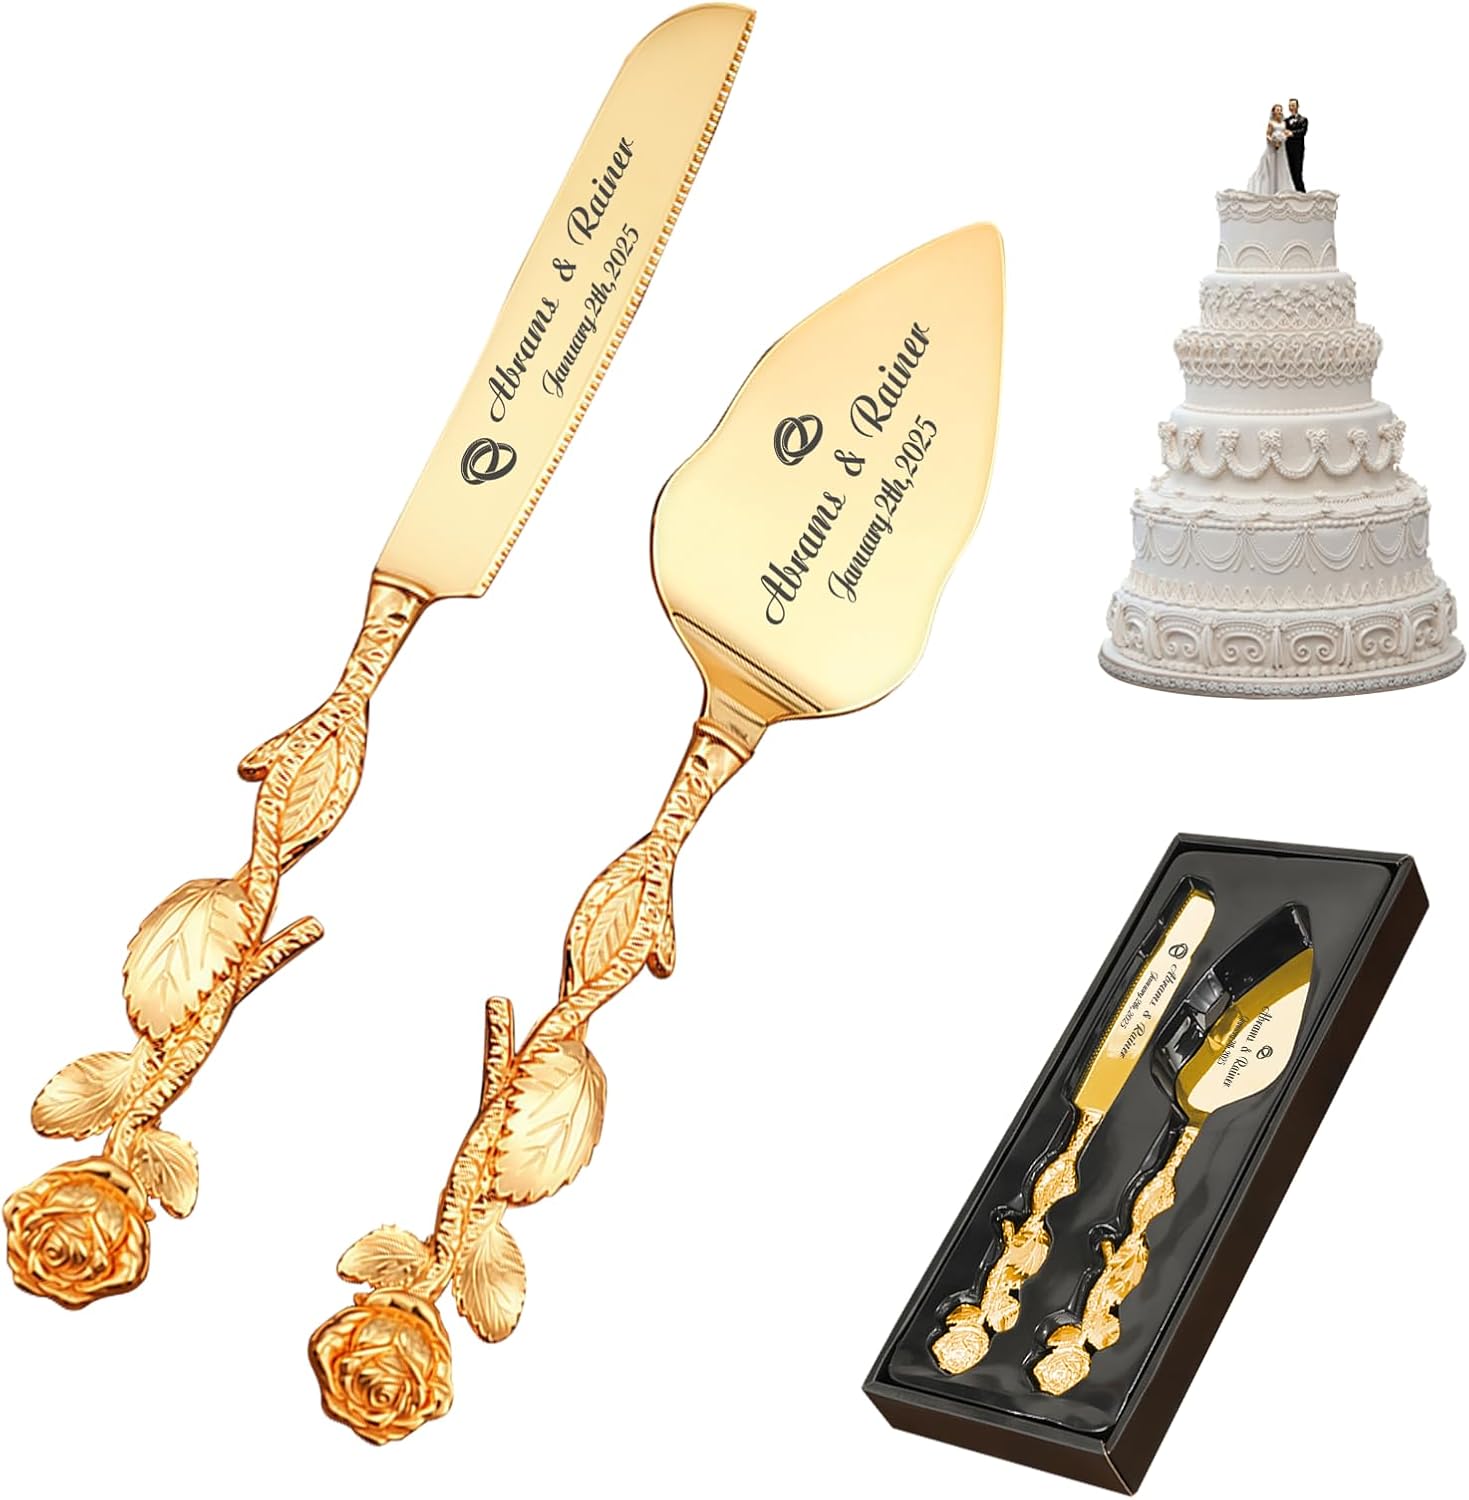
- Custom Cake Cutting Set for Wedding: Crafted from 304 stainless steel, the sleek knife & server feature serrated edges for effortless slicing. Engrave names or phrases on the set to create a one-of-a-kind keepsake—a personalized touch for lasting memories
- Personalized Mr & Mrs Champagne Flutes:Personalize with the bride and groom’s names and wedding date to create a unique, lifelong keepsake. Advanced tech ensures vivid, long - lasting details that stay clear through every toast
- Premium Craftsmanship & Durability:The cake knife and server set is rust-proof and built to last, while the champagne flutes are lead-free and resistant to chipping. Both sets undergo strict quality checks, ensuring years of use as wedding keepsakes
- Complete Wedding Gift:All-in-one set bundles cake knife/server & forks, champagne flutes. Packed in a premium gift box—no wrapping needed. Perfect for weddings, engagements, showers & anniversaries: a convenient, impressive gift in one purchase
- Versatile for Multiple Occasions:Champagne flutes shine at romantic dinners, holidays & more. Cake set works for birthdays, housewarmings & gatherings. A multi-purpose keepsake extending wedding memories
| ASIN | B0FD3P4T79 |
|---|---|
| Text | 7 text inputs |
| Color | Silver |
| Blade Edge | Serrated |
| Brand Name | HJX |
| Unit Count | 3.0 Count |
| Blade Color | Gold |
| BladeLength | 10.6 Inches |
| Item Weight | 1.2 Pounds |
| Manufacturer | HJX |
| Handle Material | Stainless Steel |
| Construction Type | Forged |
| Blade Material Type | Stainless Steel |
| Included Components | Champagne flutes |
| Is the item dishwasher safe | No |


Bestseller ranking
Jewelry


Customers who viewed this product also viewed
Router Parts & Accessories


Correction of product information
If you notice any omissions or errors in the product information on this page, please use the correction request form below.
Correction Request Form